Wrapping, presentation and messages
Arrange three items so the set makes sense
Arrange each item so the recipient can name it, lift it and understand why it belongs in the gift.
Read the article

Share this article
Share this article
A useful read, worth passing on
Arrange three items so the set makes sense
For Instagram or Stories, save the portrait image or choose it from your device’s sharing menu.
Save portrait image · Save tall Pinterest imageChoose where to share this article.
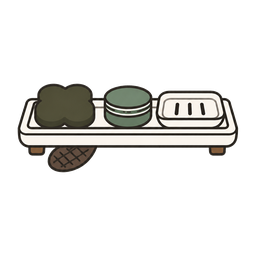
Three objects may look beautifully balanced from above. Turn the arrangement towards the person receiving it: can they identify each item, lift it and see why it belongs? A useful layout can explain a set before the note does, while keeping the opening simple.
A useful arrangement explains what belongs together and makes the contents easy to identify. Keep stability, opening and transport as separate checks.
Confirm why there are three items
Before arranging, write each item's job. One might be the main gift, one a useful companion and one an optional personal detail. Three is not a required number. If one item is filler, remove it and arrange two. A clear pair is preferable to a balanced photograph of unwanted objects.
Describe alternatives honestly. Two different products serving the same function might be intended choices, not sequential steps. A message card can explain that distinction. Do not use arrangement to suggest a routine the recipient never wanted or a cosmetic combination whose use has not been verified.

Read this visual in words
- Main gift
- Useful companion
- Optional personal detail
- Remove filler
Measure the real contents
Record each item's length, width, height and any part that must not be compressed. Check labels, seals, closures and fragile features. Choose a presentation surface or container only after the contents are known. A decorative container is not automatically appropriate for contact with a cosmetic, food or fragile material. Measure the actual protruding corners, not the tidy rectangle you wish the objects made.
This is a conceptual layout tutorial, not a physically tested packaging specification. The actual objects, materials and opening sequence need prototype checks. Do not infer stability from an illustration. A generic box in a diagram does not establish that Bebrų supplies such a box or includes it in a commercial set.

Read this visual in words
- Length width height
- Protruding parts
- Labels and seals
- Do not compress
- The sketchbook, pencil and note are fictional tutorial objects. Measure the real items, including protrusions, without compression.
- Check labels, seals, closures and fragile features before choosing a container.
- No dimensions are implied by this drawing; choose the container after measuring.
- Measure each real item and the planned arrangement, including its highest part. The side-view note lies flat with the other contents.
Give the anchor a visible position
Place the main gift where its name can be read first. Centre is one option, not a rule. A tall item might stand behind lower companions if that is stable; a flat book may sit beneath a loose message card. Avoid covering the anchor's identity with decoration or another object.
Try a simple left-to-right sequence on a sheet of paper. Draw outlines rather than buying a container immediately. Label them main, companion and extra. If the recipient reads the arrangement differently, add a clear contents card instead of assuming visual hierarchy explains everything.
Group by purpose, not height alone
Place items used together near each other, provided actual material compatibility permits it. Keep separately used items distinguishable. Products should remain in their original labelled packaging; do not open them to make the arrangement more attractive. Check whether contact, leakage, pressure or fragrance transfer requires separation.
In a fictional drawing set, the requested sketchbook is the anchor, a wanted pencil is the companion and a note is the extra. The pencil sits where it is visible without scoring the book. The note explains the choice. Decorative stones might make a photograph appealing but create weight and an unclear promise of included contents; leave them out or clearly label them as props.
In an illustrative drawing gift, the sketchbook, requested pencil and note each have a job. The pencil stays visible without scoring the book; the note offers a prompt without turning it into an assignment. Once the roles are clear, the giver removes decorative stones from the plan. The overhead picture loses weight and confusion while keeping its actual purpose. An arrangement can explain a gift without inventing more contents.
Add only necessary restraint
A container must hold the contents without forcing closures, bending labels or putting pressure on fragile pieces. A loose arrangement for an in-person handover may need different restraint from a journey. Check every chosen fastening or divider with the actual items. Do not prescribe a universal filler thickness or promise that tissue alone prevents damage.
Consider the opening in reverse. Can each object be lifted without pulling apart another? Is the first accessible point obvious? A removable divider or visible edge might help, but only actual testing can establish the result. Avoid hidden staples, sharp wire and tightly bound layers that exist only for appearance.

Read this visual in words
- Note removable
- Anchor identity visible
- Each item lifts independently
- Actual fastening checked
- Try the opening in reverse with the real items: the note, sketchbook and pencil each need an independent lift.
- Illustrative rehearsal, not proof of fastening strength or transit protection.
Make the note and contents explicit
A short card could say: “The notebook is the main gift; the pencil is the type you asked for. The note is a drawing prompt, not an assignment.” If packaging or an accessory is part of the gift, say so. If it should be returned, agree that beforehand rather than surprising the recipient at opening.
Photograph the complete intended contents without adding unmarked props. Include scale and an unobstructed view when the picture is used as a shopping guide. State any optional wrapping or customisation separately. A photograph should not make a buyer believe an extra item is included because it sits inside the box.
Check two different presentation cases
A fictional in-person gift of three sturdy, sealed items may work on a simple tray or in a modest container after stability is checked. It still needs easy lifting and visible identities. The same visual layout is not automatically suitable for courier delivery. A tray that works across a room may still be the wrong arrangement inside a courier parcel.
For a distant recipient, choose transit protection appropriate to every item and the actual route, then add presentation within that protection where practical. If a beautifully layered arrangement creates pressure or movement, simplify it. Shipping success matters more than reproducing an overhead image at the destination. Seek current carrier and item-specific guidance rather than treating this tutorial as a shipping standard.

Read this visual in words
- In person: stable display and easy lifting
- Courier: protection for each item and the actual route
- Display stability does not establish journey protection. The courier cross-section is a concept, not a tested packaging specification.
Finish with a reverse-unpacking rehearsal
Using the prototype, take out the note, identify the contents and remove each item. Check what is visible at each stage, what remains labelled and whether anything needs unexpected force. Record problems honestly and adjust. A successful private rehearsal is still not evidence of universal accessibility.
Your final arrangement should answer three questions without a speech: what is included, why it belongs together and how to begin opening. If it cannot, reduce clutter or add plain words. The best layout lets the gift become useful after the picture has been taken.
Picture a giver rehearsing the prototype in reverse: note first, names visible, then each item lifted without pulling another one loose. A beautiful top view had hidden a blocked edge, so the layout changes. That discovery is useful before handover. The rehearsal still proves only what was tried with those materials; a courier journey and the recipient’s own opening preferences remain separate questions rather than disappearing into the photograph.
Related reading
 The anatomy of a thoughtful gift set
 Packing a set for a distant recipient
 Wrapping without concealing product instructions
Editorial notes
Editorial notes
Original guidance with fictional worked examples. The generic example items do not describe a purchasable Bebrų set. Check current product details, supplier services and the finished wrapping before using the arrangement.
Everyday story examples in this article are imagined.
- The anatomy of a thoughtful gift setIf one of the three objects has no wanted role, rebuild the set around an anchor and a genuinely useful companion.
- Packing a set for a distant recipientBefore sending the attractive layout, protect every actual item for the real journey rather than preserving the photograph at any cost.
- Wrapping without concealing product instructionsIn a fictional two-item gift, Ona keeps the original food and cosmetic packs separate and adds one greeting. The message brings them together; the decoration does not need to merge their identities or instructions.